Wednesday, February 25, 2009

Midweek Kitchen Confessions 10: Comfort Chip Cookies


I make them to help myself feel better. About life. It's not eating them that does it for me, it's making them. I thought if I made them with the girls after school it would help them feel better. About life. But I ended up making them by myself. And the girls still don't feel better.

P.S. I use half salted butter and half unsalted and I follow the high altitude directions in the Nestle Toll House recipe. Otherwise, here in Utah, cookies end up as flat as paper.

Friday, February 20, 2009

Wine Cake


So, a family secret you probably won't care about: my Great Aunt Dorothy has never been known as a great dessert-maker. When my Great Grandpa lived with her for several years before his death, he complained bitterly about her baking. He said everything she made was too dry. In her defense, at the time, they were living at a pretty high altitude and she most likely had a difficult time altering her recipes to deal with the altitude. Yes, I know I've already lost half of you. But try to stay with me, it'll be worth it.

Aunt Dorothy is known for one great contribution to our family culinary heritage: Wine Cake. I doubt she created the recipe, although, who knows? But she did bring it into the family fold, and for that we are all grateful.

I confess, I cheated a little...well, a lot...this week. I cheated on my commitment to making everything from scratch and using organic and/or local ingredients wherever possible. This recipe goes about as far in the other direction as you can imagine. But it's delicious. And super super easy. Which is necessary when my stress level=buying and selling a house.


Those are all the ingredients right there. Yup. That's it. Here's the recipe:

Wine Cake *click here for printable version*

1 pkg. yellow cake mix
1 small pkg. instant vanilla pudding
4 eggs
3/4 cup oil
3/4 cup sherry
1 tsp. nutmeg

Combine all ingredients and beat. Pour into greased and floured tube (bundt) pan. Bake at 350 for approximately 1 hour. Let cool in the pan for 20-30 minutes. Then turn out onto a cooling rack to cool completely.


That's it. For one of the most delicious cakes you'll ever eat. It's spicy and nutty and moist with a slightly crispy outside.


P.S. I had to find an excuse to put these dear little angel candleholders on a cake, even though we weren't celebrating a birthday. I remember them vividly from my childhood. On an angel food cake. With pink frosting.


TGIP Rating--Wine Cake--KEEPER--And pass down for more generations. And think of active, funny, healthy, wise Aunt Dorothy every time you make it.

Next up: Rye bread. That our new house may never know hunger.

Monday, February 16, 2009

Red Hot Velvet Cake

Second time around. I got past the Shortening Sabotage. I survived moving out of our house. I managed the cleaning of our newly vacated house. And today I tackled Red Hot Velvet Cake again. And it was sooo worth it.


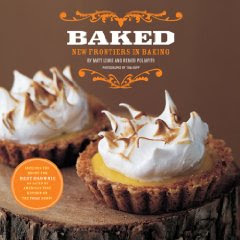
Once again (and I guarantee it won't be the last time) I shall sing the praises of this book. This recipe is a lot of work. It does make for a lot of dishes to wash. And your kitchen may look more like a crime scene than anything else.


But I wouldn't call it difficult at all.

To be honest, my second attempt wasn't as red as the first (foiled--maybe from now on I'll call it "shorteninged") attempt. I'm not sure why. I used more red gel food coloring, but still not the 2 tablespoons called for in the recipe (note: the tubes of gel food coloring sold in the baking aisle don't contain a total of 2 tablespoons). I did as instructed and resisted the urge to make the cake super red. But I'm a little disappointed with the color I ended up with. It doesn't have the brick-y red color I was hoping for. Is it because the recipe calls for dark unsweetened cocoa and I couldn't find such a thing? If you have a source or suggestion for this let me know.

The frosting...where shall I start? I have been looking for ages for a buttercream frosting that doesn't require shortening or cooking sugar to some magical "soft ball" stage. The first stage of the frosting does involve cooking, but it's not delicate by any means. This may well be the one. My one and only.


In spite of the 3 sticks of butter involved, the frosting is light and fluffy. You could skip the cinnamon added to it in this recipe and just use vanilla (or some other extract) and it's a perfectly good buttercream for any kind of cake. The Pie Queen and I have many experiments to conduct involving rum.

This was (if memory serves) my first 3-layer cake. Also the first time I've crumb-coated a cake. I've always been concerned that I wouldn't end up with enough frosting for the cake. But this recipe makes the perfect amount.


I wanted to make the pretty design in the pictures in the cookbook: the top of the cake ringed with chocolate discs with red hots on top. But I couldn't figure out what to use for the chocolate discs. I contemplated using the bottom half of a chocolate kiss, but then I ate all the kisses. Wouldn't you know it, the Pie Queen had the perfect solution: semi-sweet chocolate wafers made for melting.


I melted a few to use as "glue", turned the others upside-down on the top of the cake and stuck red hots onto them. Almost picture perfect.


The recipe definitely delivers on its promise: "The buttermilk and shortening give this cake a "springy" crumb that pairs beautifully with our cinnamon frosting." What's more--Seconda ate a whole piece. Gobbled it right up. That's the sign of a good dessert.

TGIP Rating--KEEPER--find a way to make it more red and/or find some dark unsweetened cocoa. Try this buttercream frosting recipe without cinnamon on other cakes.

Next up: An ancient family secret: Wine Cake.


P.S. If someone can figure out where I can buy NEW Tupperware tubs like the one pictured above, I'll owe you. Big.

Sunday, February 15, 2009

Weekend Kitchen Confessions 1: Shortening Sabotage

When the shortening looks like this:


it's safe to say it shouldn't be used to make anything, let alone Red Hot Velvet Cake. Yes, that says "Best When Used By 01/23/06".

Will try again tomorrow. With fresh shortening.

Sunday, February 8, 2009

Chewy Pecan Squares


Easy-peasy-pecan-squeezy. This recipe originally called for walnuts, but I altered it (having a huge package of pecans in my freezer, but no walnuts, it seemed to make sense). I actually like it better this way. Sometimes walnuts are a little too bitter for me. With pecans, this recipe is sort of reminiscent of pralines. Crunchy, chewy, buttery, delicious.


Chewy Pecan Squares
*click here for printable version*

1 egg, unbeaten
1 cup brown sugar, packed
1 tsp. vanilla
1/2 cup flour
1/4 tsp. baking soda
1/4 tsp. salt
1 cup chopped pecans

Stir together egg, brown sugar, and vanilla. Quickly stir in flour, baking soda, and salt. Add pecans. Spread in greased 8" square pan. Bake at 350 for 18-20 minutes. Note: Recipe can easily be doubled, using a 9" x 13" pan and same oven temperature and baking time.


Note to self: When you unpack in your new kitchen, find the chopper as quickly as possible. Chopping nuts with a knife is possible, but not preferable.


I'm still struggling with using organic brown sugar. It gets very stale very quickly. And when I say stale, I mean rock hard. It also doesn't really "pack" in the way regular brown sugar does. I had to cook it in the microwave for 3 or 4 minutes just to get it to a point where I could measure it out. But, it seems to taste just fine, so I'll keep trying to work with it.


The batter is thick-ish and sticky and so is a little difficult to spread into the pan. But it puffs up nicely when it cooks.


Served the squares with vanilla ice cream. Yum.


(Please pardon the styrofoam. I took this to a family gathering and my family is nothing if not numerous. So, we don't really do the whole "fancy dinnerware" thing. Except on Thanksgiving.)

Anyway...

TGIP Rating--Chewy Pecan Squares--KEEPER (in fact, don't ever make them with walnuts again)

Next up: I move out of this house on Friday/Saturday. I pack up my kitchen Wednesday. This is definitely the most difficult part of the move for me. It's for less than a month, but boxing up my kitchen stuff and not being surrounded by it is, well, difficult. So...I bake at the Pie Queen's house this week. And I'm trying a modern version of a cake I've always heard about but never baked. In fact, I don't think I've ever eaten it. Red HOT Velvet Cake from the Baked cookbook. For St. Valentines' Day, you see.

Thursday, February 5, 2009

Midweek Kitchen Confessions 9: That's How I Roll


These are on the menu for dinner tonight. No, they are not made from scratch. Well, scratch that. Some machine somewhere made them from scratch. I am making them from frozen dough. Which is not what I intended for baking/blogging this year. But, my freezer is full and we need to eat its contents so I don't have to pack or throw away any of that stuff.

Don't be surprised if I invite you over for a dinner made up of badly freezer-burned stir fry veggies, 9-month-old creamsicles, and Mickey Mouse-shaped chicken nuggets. All in the name of Moving Out!

Sunday, February 1, 2009

Rolled Buttermilk Scones


Some treats are so delicious it's hard to believe that they're actually easy to make. These scones are an example. Really, really simple. And delightfully flaky, buttery, and delicious. The lemon zest cuts through some of the sweetness and butter (not that those are bad things) and gives a surprising and fresh element to the flavor.

Here is the full text of the recipe directly from Baking with Julia:


Buttermilk Scones *click here for printable version*

Makes 12 triangular or 24 rolled scones

Think of scones as British biscuits. The are made in a manner similar to biscuits and, in fact, share biscuits' buttery-layered texture, but their name, their shape, and the fact that they're served with tea rather than gravy lift them to the level of fancier fare

Here are scones two ways: the traditional triangle and the rolled--tender buttermilk dough rolled around chopped fruits, nuts, and/or jam. Whichever way you choose, they're luscious: à la the British, with tea and whipped cream, or served the American way, with coffee and a gloss of jam.

THE SCONES

3 cups all-purpose flour
1/3 cup sugar
2-1/2 teaspoons baking powder
1/2 teaspoon baking soda
3/4 teaspoon salt
1-1/2 sticks (6 ounces) cold unsalted butter, cut into small pieces
1 cup (approximately) buttermilk
1 tablespoon grated orange or lemon zest

1/2 stick (2 ounces) unsalted butter, melted, for brushing
1/4 cup sugar, for dusting

4 tablespoons jam or jelly and/or 4 tablespoons diced or small plump dried fruits, such as currants, raisins, apricots, or figs, for filling (optional)

Position the oven racks to divide the oven into thirds and preheat the oven to 425.

Mixing and Kneading:
In a medium bowl stir the flour, sugar, baking powder, baking soda, and salt together with a fork. Add the cold butter pieces and, using your fingertips (the first choice), a pastry blender, or two knives, work the butter into the dry ingredients until the mixture resembles coarse cornmeal. It's OK if some largish pieces of butter remain--they'll add to the scones' flakiness

Pour in 1 cup buttermilk, toss in the zest, and mix with the fork only until the ingredients are just moistened--you'll have a soft dough with a rough look. (If the dough looks dry, add another tablespoon of buttermilk.) Gather the dough into a ball, pressing it gently so that it holds together, turn it out onto a lightly floured work surface, and knead it very briefly--a dozen turns should do it. Cut the dough in half.


To make triangular shaped scones: roll one piece of the dough into a 1/2-inch-thick circle that is about 7 inches across. Brush the dough with half of the melted butter, sprinkle with 2 tablespoons of the sugar, and cut the circle into 6 triangles. Place the scones on an ungreased baking sheet and set aside while you roll out the rest of the dough.

To make rolled scones: roll one piece of dough into a strip that is 12 inches long and 1/2-inch-thick (the piece will not be very wide). Spread the strip with half of the melted butter and dust with half of the sugar. If you want to spread the roll with jam and/or sprinkle it with dried fruits, now's the time to do so; leave a narrow border on a long edge bare.


Roll the strip up from a long side like a jelly roll; pinch the seam closed and turn the roll seam side down.


Cut the roll in half and cut each piece into six 1-inch-wide roll-ups. Place the rolled scones cut side down on an ungreased baking sheet, leaving a little space between each one. Repeat with the remaining dough.


Baking the scones:
Bake the scones for 10 to 12 minutes, until both the tops and bottoms are golden. Transfer the scones to a rack to cool slightly. These are best served warm but are just fine at room temperature.


Storing:
If you're not going to eat the scones the day they are made, wrap them airtight and freeze; they'll stay fresh for a month. To serve, defrost the scones at room temperature in their wrappers, then unwrap and reheat on a baking sheet for 5 minutes in a 350 degree oven.

Contributing Baker--Marion Cunningham
(the woman behind the Fannie Farmer Cookbook)


A few notes:

I don't use a lot of buttermilk in my baking, and it only comes in quart-size bottles from my dairy delivery, which I just can't use quickly enough. So, I make my own buttermilk. I combine 1 cup of milk with 1 tablespoon of white vinegar and allow it to sit for 10 to 15 minutes until it is slightly curdled. It works just as well as the other stuff.

I didn't have enough unsalted butter for everything, so I used all unsalted in the dough and half salted in what I melted for brushing on. It was just fine.

I had never heard of rolled scones, and wanted to try them. I used dried cherries (one of my favorite things), but you could experiment with all kinds of nuts and fruits and jams and...I look forward to doing that. I actually like them a little better than the triangular scones because they're smaller. It doesn't say anything about adding fruits to triangular scones, but if you wanted to, I imagine you could just combine them with the dry ingredients before adding the buttermilk and the dough would still be roll-able.


I like to eat my scones with raspberry jam and whipped cream. But these are so buttery and flaky you really don't need to add anything and they're still lovely. I took them to a cocktail party. And even though they're not the usual cocktail party fare, they were well and truly gone by the time I left, so, they must have been good.

TGIP Rating--Buttermilk Scones--KEEPER (and try lots of different variations--you could even make a cinnamon roll version that would be mmm delicious)

Next up: Trying to pack one's kitchen into boxes and still have what one needs to prepare food is...complicated. So, next I'm going to do something that is neither heavy on the ingredients nor the necessary tools. I'm going to alter a recipe from my childhood (I have no idea where the recipe comes from--Pie Queen?). We used to make Chewy Walnut Squares and they were simple and crunchy and chewy and delicious. I'll be changing them to Chewy Pecan Squares.